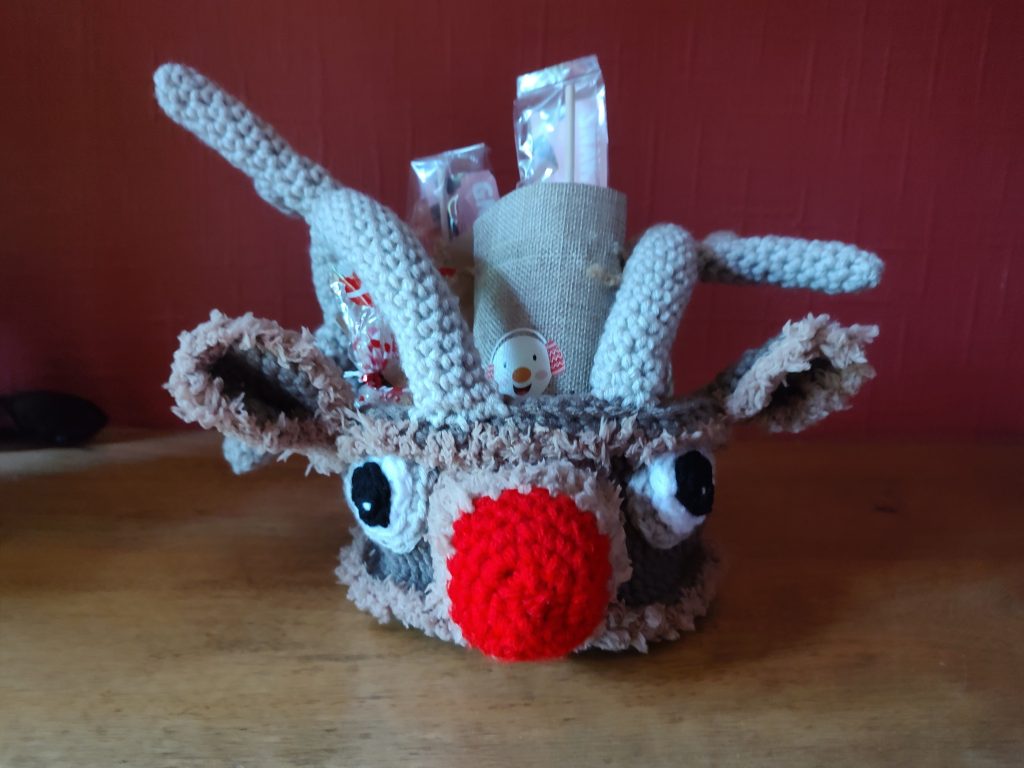
Rudolph the Red Nose Reindeer Treat Basket
Materials
- Yarn as indicated below
- Crochet hooks: 6 mm, 5.5 mm
- Stitch marker
- Tapestry needle
- Fibrefill Toy Stuffing
Yarn
- Dark Brown – Yarnsmiths Create Chunky Brown Bear (5070)
- White – Yarnsmiths Create Chunky White (5040)
- Black – Yarnsmiths Create Chunky Black (5000)
- Fluffy Brown – King Cole Cuddles Chunky Teddy Brown (300)
- Light Brown – Yarnsmiths Create Chunky Parchment (5060)
- Red – Yarnsmiths Create Chunky Bright Red (5110)
Skill Level
Easy, but this is not a beginner pattern as you need to be able to work front post single crochet stitches and to increase and decrease stitches. You will need to be able to crochet in both the back loops and front loops only on certain rounds.
You will also need to know how to double crochet (UK=treble crochet) and make hdc (UK=htr) crochet stitches. You will also need to be able to change colours and work in the round both using slip stitches and by the amigurumi method.
Abbreviations
Please note that I am using US crochet terms throughout. I am actually British, but I find the US terms more intuitive. Measurements are always metric.
sc – single crochet (UK = dc)
hdc – half double crochet (UK = htr)
dc – double crochet (UK = tr)
fpsc – front post single crochet (UK = fpdc)
sl – slip stitch
ch – chain
mr – magic ring
st – stitch
inc – increase by 2 st (2 stitches into the same stitch from previous row)
dec – decrease over 2 st (1 stitch across 2 stitches from previous row)
start(x) – Either mr (x sc in mr) or ch 2, x sc in 2nd chain from hook – whatever you like best [I am personally not a fan of mr and just stick to the ch 2 method]
(x) – x = number of stitches at the end of round
BLO – Back Loops Only
FLO – Front Loops Only
Y/O – Yarn Over
F/O – Fasten Off
Pattern
Basket Base (with Dark Brown)
Crochet the Basket Base for a Basic Treat Basket all in Dark Brown
Basket Body (with Dark Brown)
Crochet the Basket Body for a Basic Treat Basket all in Dark Brown
Nose (with Red, Fluffy Brown, 5.5 mm hook)
Round 1: start(6)
Round 2: (inc)* – repeat * around (12)
Round 3: (1 sc, inc)* – repeat * around, changing to Fluffy Brown on the last st (18)
Rnds 4-5: 18 sc around
Round 6: inc, 16 sc, inc (20)
Round 7: inc, 18 sc, in (22)
Round 8: inc, 20 sc, inc (24)
Round 9: inc, 22 sc, inc (26)
F/O, leaving a long tail for sewing
Eyes (with White, Black, Light Brown, make 2, 5.5 mm hook)
Pupils (with Black, make 2)
Round 1: start(6)
F/O, leaving a long tail for sewing
Eyeballs (with White, make 2)
Round 1: start(6)
Round 2: (inc)* – repeat * around (12)
F/O, leaving a long tail for sewing
Eye Patches (with Light Brown, make 2,)
Round 1: start(6)
Round 2: (inc)* – repeat * around (12)
Round 3: (1 sc, inc)* – repeat * around (18)
F/O, leaving a long tail for sewing
Ears (with Dark Brown, make 2, 5.5 mm hook)
Round 1: start(6)
Round 2: (inc)* – repeat * around (12)
Round 3: (1 sc, inc)* – repeat * around (18)
Round 4: (2 sc, inc)* – repeat * around (24)
F/O, leaving a long tail for sewing
Antlers (with Light Brown, make 2, 5.5 mm hook)
Main Antler (with Light Brown, make 2)
Round 1: start(6)
Round 2: inc, 4 sc, inc (8)
Rnds 3-35: 8 sc round (Stuffing as you go)
F/O, leaving a long tail for sewing
Antler Branches (with Light Brown, make 6)
Round 1: start(6)
Rnds 2-13 [14, 15]: 6 sc around (Add stuffing as you go; vary the lengths of the branches a little)
F/O, leaving a long tail for sewing
Assembly
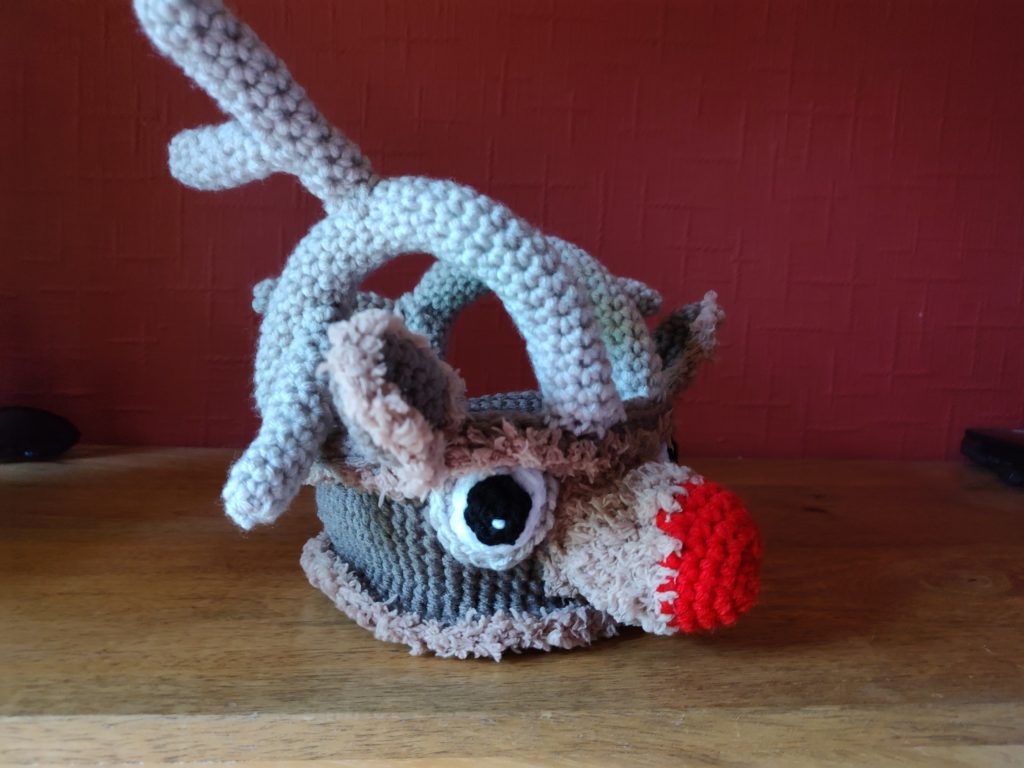
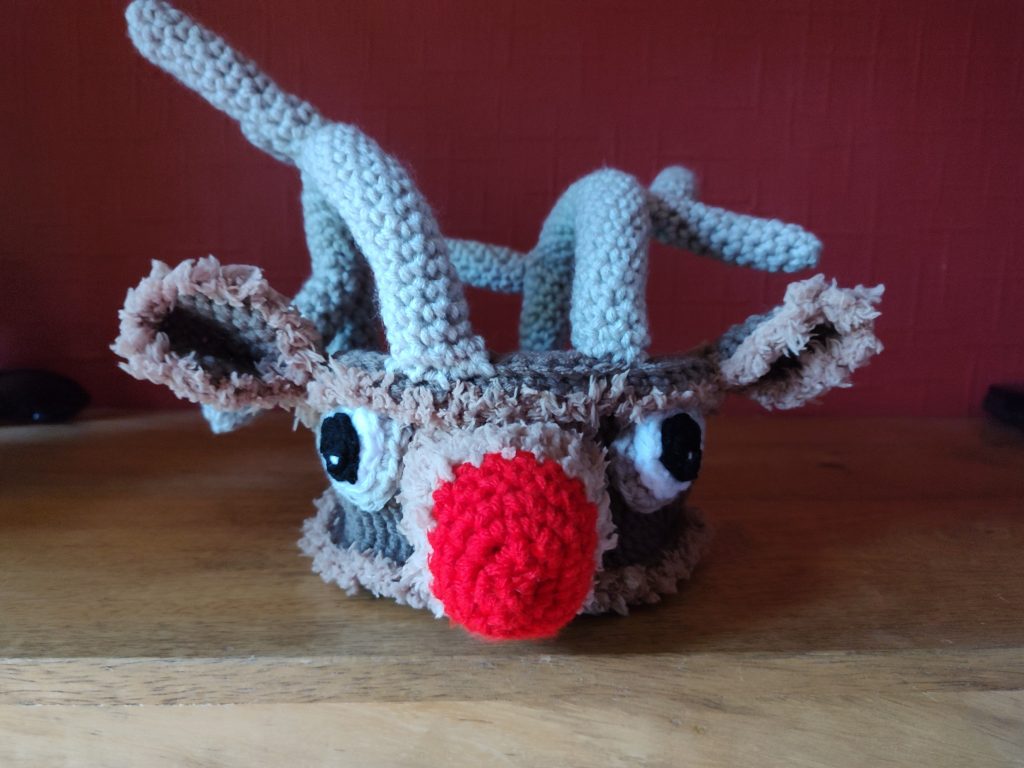
- Crochet a row of Fluffy Brown sc around the top and the bottom of the Treat Basket Body
- Stuff the Nose and sew it on to the centre of the Treat Basket from one side
- Sew the Pupils onto the Eyeballs (you may want to add a little highlight to each Pupil with White as shown in the photos first)
- Sew the Eyeballs onto the Eye Patches
- Sew the Eyes onto the Treat Basket Body near the top and next to the Nose on each side
- Crochet a row of Fluffy Brown sc around each of the Ears
- Fold the bottom of each Ear and sew it together lightly
- Sew this part of each ear onto the Treat Basket Body to the top side of each Eye
- Sew the three Antler Branches to each Main Antler, spacing them out as you prefer. I have sewn two to each Main Antler and then sewn the third as a sub-branch of one of the Antler Branches on mine.
- Sew the Main Antlers (the open bits) to the Treat Basket Body in the middle above the Nose and between the Eyes. The point of each Main Antler is then sewn to the back of the Treat Basket Body to form the handles
There you have it. Rudolph is ready to help you give out Christmas Treats! 🙂
The Legal Stuff
Copyright 2023- Cazimodo Creative by Caz Thomson. I am very happy for you to make and also sell items using this pattern, but please don’t sell or otherwise distribute the pattern itself. Please credit me with a link to the pattern if you do sell your finished item online.

