Little Santa Treat Basket
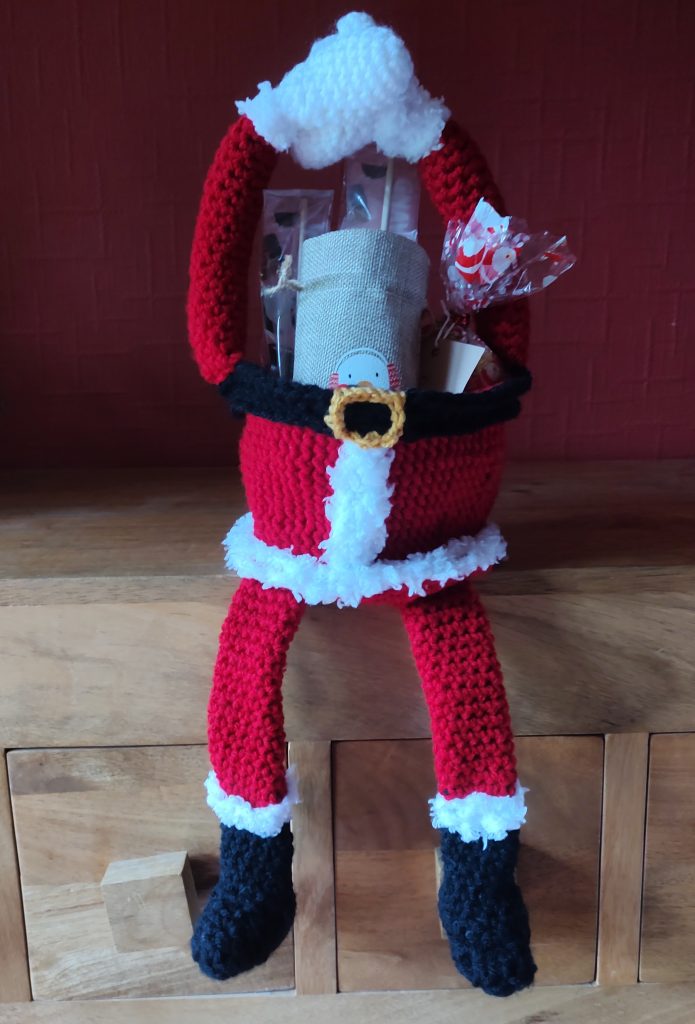
This was the first treat basket I created in 2022. I made the first basket just with the legs, but this year I have added his arms as I am putting handles on all the baskets this time around. Both the arms and legs are optional though. You could make the basket just with the Santa body if you prefer.
Materials
- Yarn as indicated below
- Crochet hooks : 6 mm, 5.5 mm, 4 mm
- Stitch marker
- Tapestry needle
- Fibrefill Toy Stuffing
Yarn
2022 Santa Treat Basket
- Red – Red Heart Super Saver Cherry Red (0319)
- Black – Red Heart Super Saver Black (0312)
- Fluffy Cream – King Cole Cuddles Chunky Solids Cream (353)
- Gold – Lion Brand Vanna’s Choice Mustard (158)
2023 Santa Treat Basket
- Red – Paintbox Yarns Simply Chunky Pillar Red (314)
- Black – Yarnsmiths Create Chunky Black (5000)
- Fluffy White – Sirdar Soft Snuggly Bunny Lamb (310)
- Gold – Deramores Studio Anti Piling Aran Marigold (70636)
Skill Level
Easy, but this is not a beginner pattern as you need to be able to work front post single crochet stitches and to increase and decrease stitches. You will need to be able to crochet in both the back loops and front loops only on certain rounds.
You will also need to know how to double crochet (UK=treble crochet) and make hdc (UK=htr) crochet stitches. You will also need to be able to change colours and work in the round both using slip stitches and by the amigurumi method.
Abbreviations
Please note that I am using US crochet terms throughout. I am actually British, but I find the US terms more intuitive. Measurements are always metric.
sc – single crochet (UK = dc)
hdc – half double crochet (UK = htr)
dc – double crochet (UK = tr)
fpsc – front post single crochet (UK = fpdc)
sl – slip stitch
ch – chain
mr – magic ring
st – stitch
inc – increase by 2 st (2 stitches into the same stitch from previous row)
dec – decrease over 2 st (1 stitch across 2 stitches from previous row)
start(x) – Either mr (x sc in mr) or ch 2, x sc in 2nd chain from hook – whatever you like best [I am personally not a fan of mr and just stick to the ch 2 method]
(x) – x = number of stitches at the end of round
BLO – Back Loops Only
FLO – Front Loops Only
Y/O – Yarn Over
F/O – Fasten Off
Special Stitches
Hdc3tog – create one hdc stitch across three stitches
[Y/O, insert hook into next st, Y/O and pull up a loop] * – repeat * 3 times, Y/O and pull through all the loops on the hook
Pattern
Basket Base (with Red)
Crochet the Basket Base for a Basic Treat Basket all in Red.
Basket Body (with Red)
Crochet the Basket Body for a Basic Treat Basket all in Red.
Legs (with Black, Red, make 2, 5.5 mm hook) Optional
First we are going to make Santa’s boots in Black and then switch to Red for the trousers.
Round 1: With Black. Ch 10
Round 2: 3 hdc in 2nd ch from hook, 7 sc, 3 hdc in last ch. Working around the opposite side of the chain : 7 sc, sl t in top of first hdc (20)
Round 3: 2 dc in BLO of each hdc, hdc, 6 sc, hdc in each of the previous 3 hdc, 6 sc, hdc, sl st in top of first dc (23)
Round 4: hdc, hdc3tog hdc, hdc dec, 6 sc, hdc dec, hdc, hdc, 6 sc, sl st into top of first hdc (19)
Round 5: hdc dec, hdc, sc dec, 2 sc, sc dec, 2 sc, sc dec, sc dec, sc, sc dec, sc,sl st in top of first hdc (13)
Round 6: 2 sc, sc dec, sc, sc dec, 3 sc, sc dec, sc, sc dec, sl st in top of first sc (11)
Round 7: 11 sc around. Stuff. We are now going to switch to the amigurumi method of working in the round without slip stitches
Rnds 8-13: 11 sc around, changing to Red on the last sc of round 13
Rnds 14-35: 11 sc around.
F/O leaving a long tail for sewing
Arms (with White, Red, make 2, 5.5 mm hook) Optional
First we are going to make Santa’s gloves in White and then switch to Red for the arms.
Round 1: With White.Start(6)
Round 2: (inc)* – repeat * around (12)
Rnds 3-8: 12 sc around
Round 9: (1sc, dec)* – repeat * around (8)
Rnds 10-12: fpsc around (8), changing to Red on the last st of round 12. Stuff Hand and keep lightly stuffing arms as you go along
Round 13: inc, 6 sc, inc (10)
Rnds 14-30: 10 sc around, turn
Round 31: 8 sc, leave rem stitches unworked
F/O leaving a long tail for sewing
Thumbs (with White make 2)
Round 1: With White.Start(6)
Rnds 2-5: sc 6 around. Stuff
F/O, leaving a long tail for sewing
Assembly
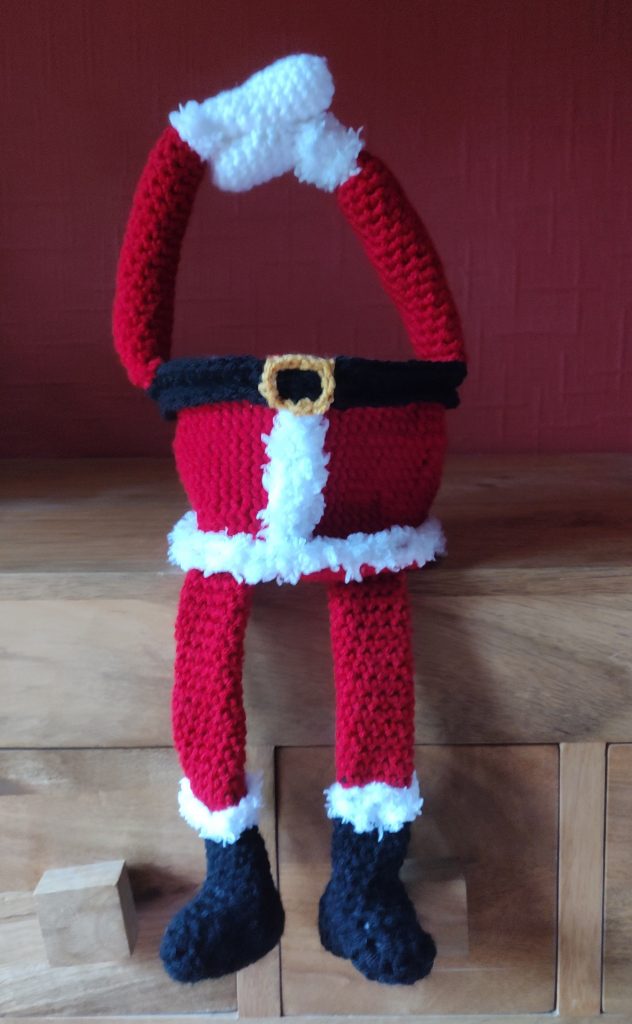
Now we are going to decorate the Basket Body:
1. Crochet 1 row of Fluffy Cream/White sc up from the bottom of the basket to the top through the stitches on the body. Crochet another row of sc back down again (these are the edges of Santa’s coat). Note that if you are using Sirdar Snuggly Bunny instead of King Cole Cuddles, you will probably need to crochet two rows on each side to get the same effect. This is because the Sirdar is an Aran weight yarn, where the King Cole version is Chunky. If using Sirdar use a 4 mm hook. If using King Cole, use a 5.5 mm hook.
2. Without breaking the yarn, crochet 2 rows of Fluffy Cream/White sc around the bottom of the basket. F/O and weave in ends.
3. With Black, crochet 3 rows of sc around the top of the basket, through the stitches of the body and through the stitches of the Fluffy Cream edge so that the Black sits over the Fluffy Cream stitches. This is Santa’s belt. F/O and weave in ends.
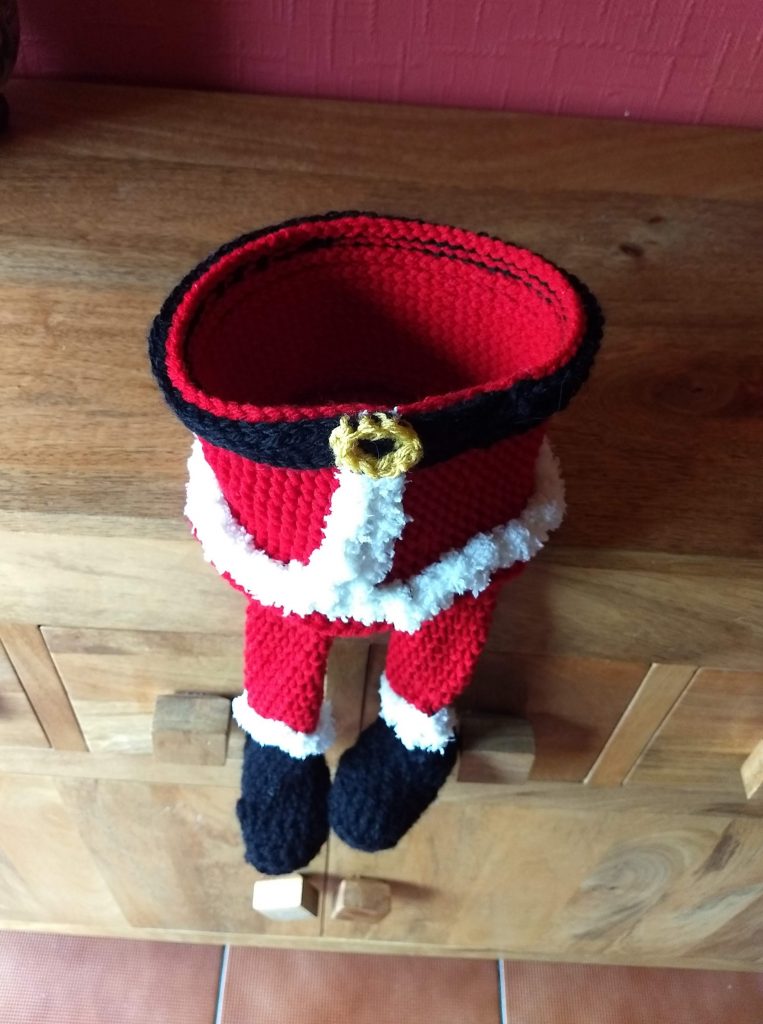
4. With Gold crochet sc up from the bottom of the belt to the top and across and down again and across (see picture) where the belt is on top of the Fluffy Cream border. This is the belt buckle. F/O and weave in ends.
5. If you have made legs then work a round of Fluffy Cream/White around the last round of Black and the first round of Red. F/O and weave in ends. Use ends to sew up gaps so that it all looks neat and trim.
6. Fold legs flat and sew under bottom of basket about a third of the way in on either side.
7. If you have made the arms then work two rounds of Fluffy Cream/White around the white post stitches on the wrists of the gloves. Sew the thumbs to the gloves.
8. Lightly sew the two hands together above and sew the arms together on the rim of the basket using the extra stitches in round 31 to help position the arms on the rim so that they form the basket handle.
That’s it. All done! Fill with little treats and present to that special someone on the day for oohs and aahs 😉
The Legal Stuff
Copyright 2023- Cazimodo Creative by Caz Thomson. I am very happy for you to make and also sell items using this pattern, but please don’t sell or otherwise distribute the pattern itself. Please credit me with a link to the pattern if you do sell your finished item online.

